Unreal
This guide shows you how to set up your development environment and create a spatialized sound effect with the Resonance Audio plugin for Unreal.
Prerequisites
You’ll need headphones to experience the spatial audio effects in this guide.
Download and build Unreal Engine with Resonance Audio plugin from source
- Gain access to Epic’s GitHub repository.
-
Download or clone the 4.19-resonance-audio branch on the repository.
Note that this page displays a404error if you have not yet gained access to Epic’s GitHub repository. -
Follow Epic’s instructions on Building Unreal Engine from Source.
Warning: Avoid overwriting Resonance Audio binaries when running the
setupscript in a terminal window. If you see:The following file(s) have been modified: Engine/Plugins/Runtime/ResonanceAudio/... Engine/Source/ThirdParty/ResonanceAudioApi/... Would you like to overwrite your changes (y/n)?
Type
nto opt out of overwriting. This prevents the script from replacing Resonance Audio binaries with an older version.
Create a new UE4 project with the Resonance Audio plugin
-
Open the UE4Editor and create a new Blueprint/C++ project.
-
Select First Person. Leave all other default settings in place.
-
The Resonance Audio plugin should be enabled by default. To check its status, go to Edit > Plugins and type “Resonance Audio”.
Make sure that the Resonance Audio box is checked.
Set up plugins for selected platforms
In Unreal, you can select plugin components to use for the following platforms:
- Android
- iOS
- Linux
- Mac
- Windows
Note: Currently, the Spatialization and Reverb plugins must be enabled for the Resonance Audio plugin to work properly.
To set up the plugins:
-
Open Settings and select Project Settings….
-
Scroll down to Platforms and select a supported platform.
-
In the Audio section for all Spatialization Plugin, Reverb Plugin and Occlusion Plugin select Resonance Audio from the drop-down list.
-
(Optional) Repeat the above steps for other platforms.
Configure plugin rendering quality settings
-
Open Settings and select Project Settings….
-
Scroll down to Plugins > Resonance Audio.
-
Open the General settings tab and find the Quality Mode drop-down.
-
By default, Binaural High Quality is the selected mode. Select a different mode if needed.
Note: In all binaural modes, you can render each sound source using head-related
transfer functions (HRTF) or stereo panning. HRTF is the default option.
If you select the Stereo Panning quality mode, you cannot change the
rendering mode for individual sound sources to HRTF (binaural).
See Spatialize sounds with the Resonance Audio plugin for more details.
Create a new object with an Audio Component
-
Open the Content Browser and select Content > StarterContent > Blueprints.
-
Locate the
Blueprint_Effect_Fireblueprint. -
Drag and drop the blueprint into your level.
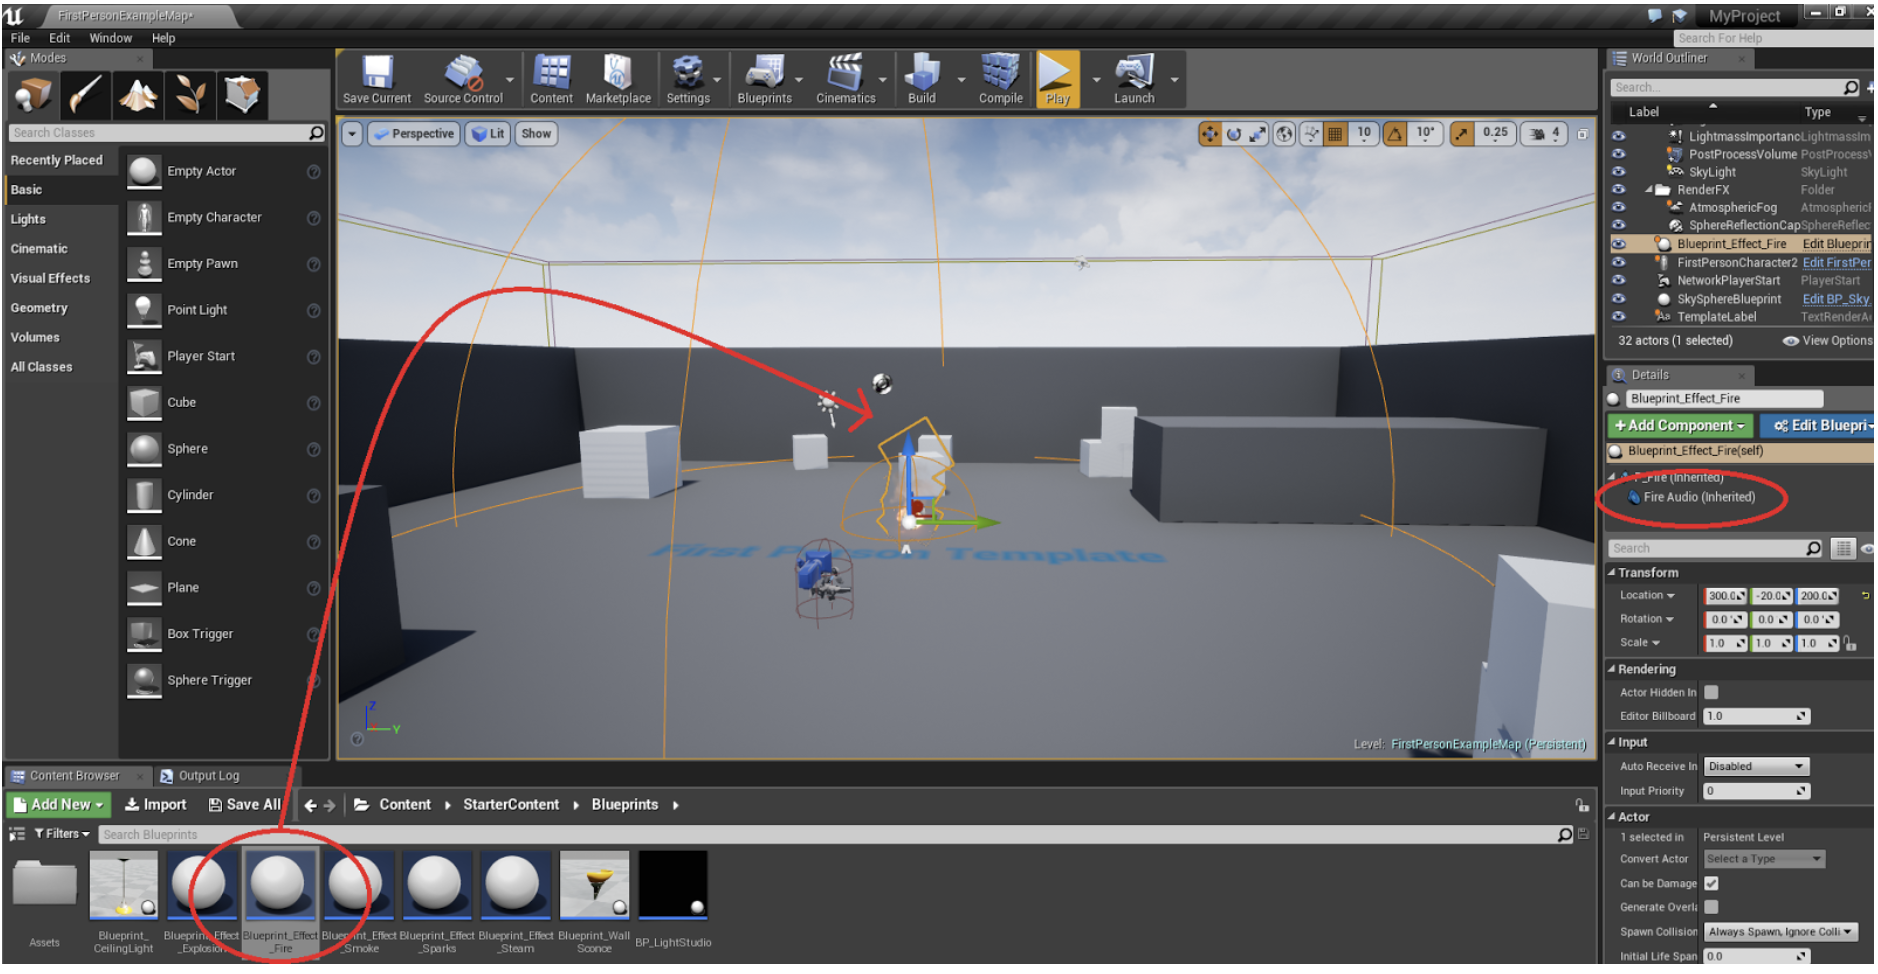
Note: You can also create an empty sound source. To do this, create a new ‘Ambient Sound’ by dragging and dropping it into the editor window.
Preview the sound effect
-
Click Play to preview the game.
You should see something like this and hear a fire sound effect.
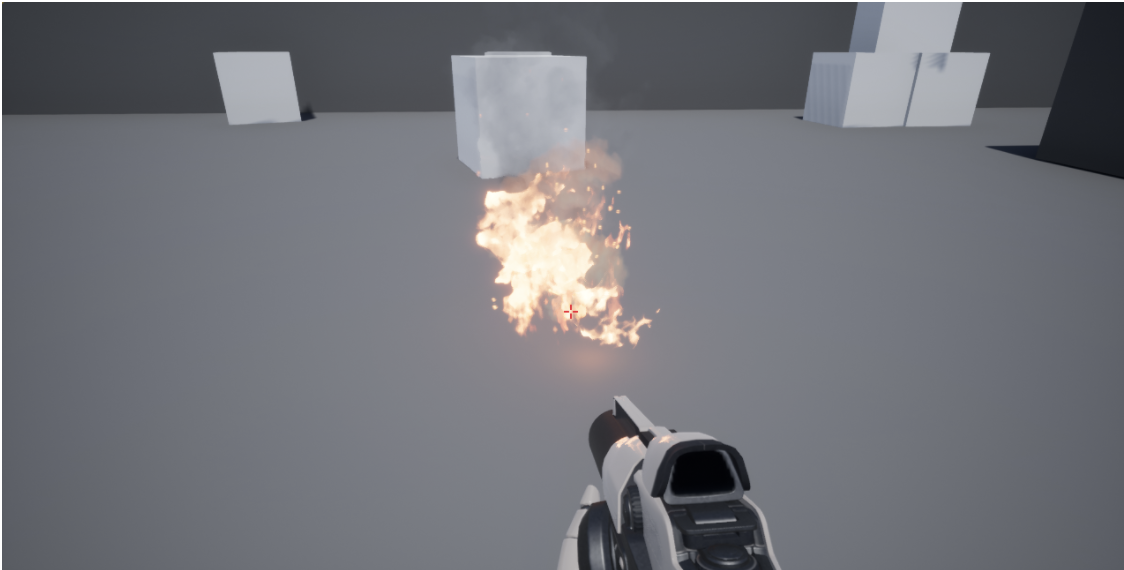
The sound effect is rendered using standard UE4 stereo panning. In the next section, we’ll add HRTF spatialization to the sound effect.
Spatialize sounds with the Resonance Audio plugin
Configure the spatialization method
-
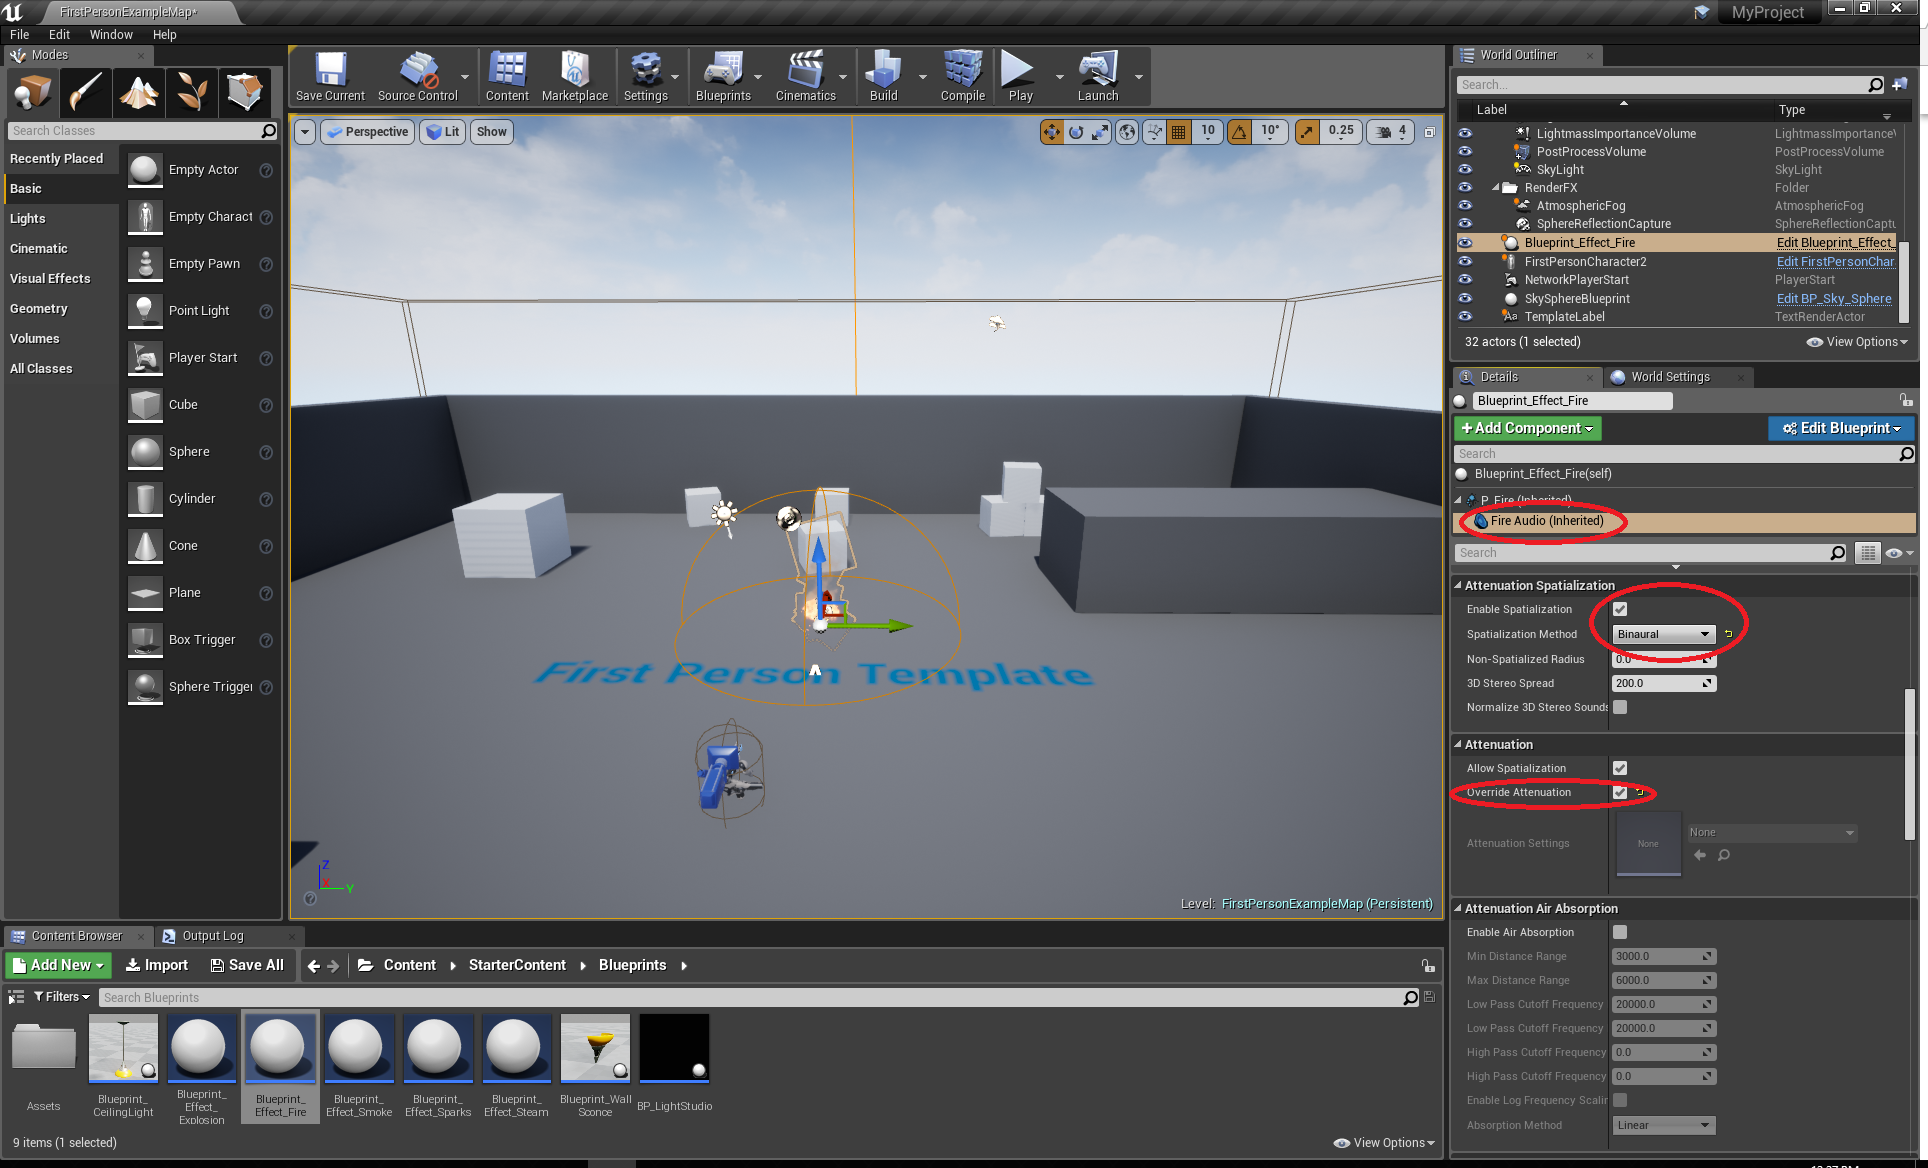
Select the
Blueprint_Effect_Fireobject and open the Details panel.Note that
Blueprint_Effect_Firehas two components:P_Fire(Particle System Component)Fire Audio(Audio Component).
-
Select
Fire Audioand navigate to Attenuation. -
Select Override Attenuation.
-
Scroll up to Attenuation Spatialization. Make sure that Enable Spatialization is selected.
-
In the Spatialization Method drop-down list, change Panning to Binaural.
Create new spatialization plugin settings
-
Scroll down to Attenuation Plugin Settings.
-
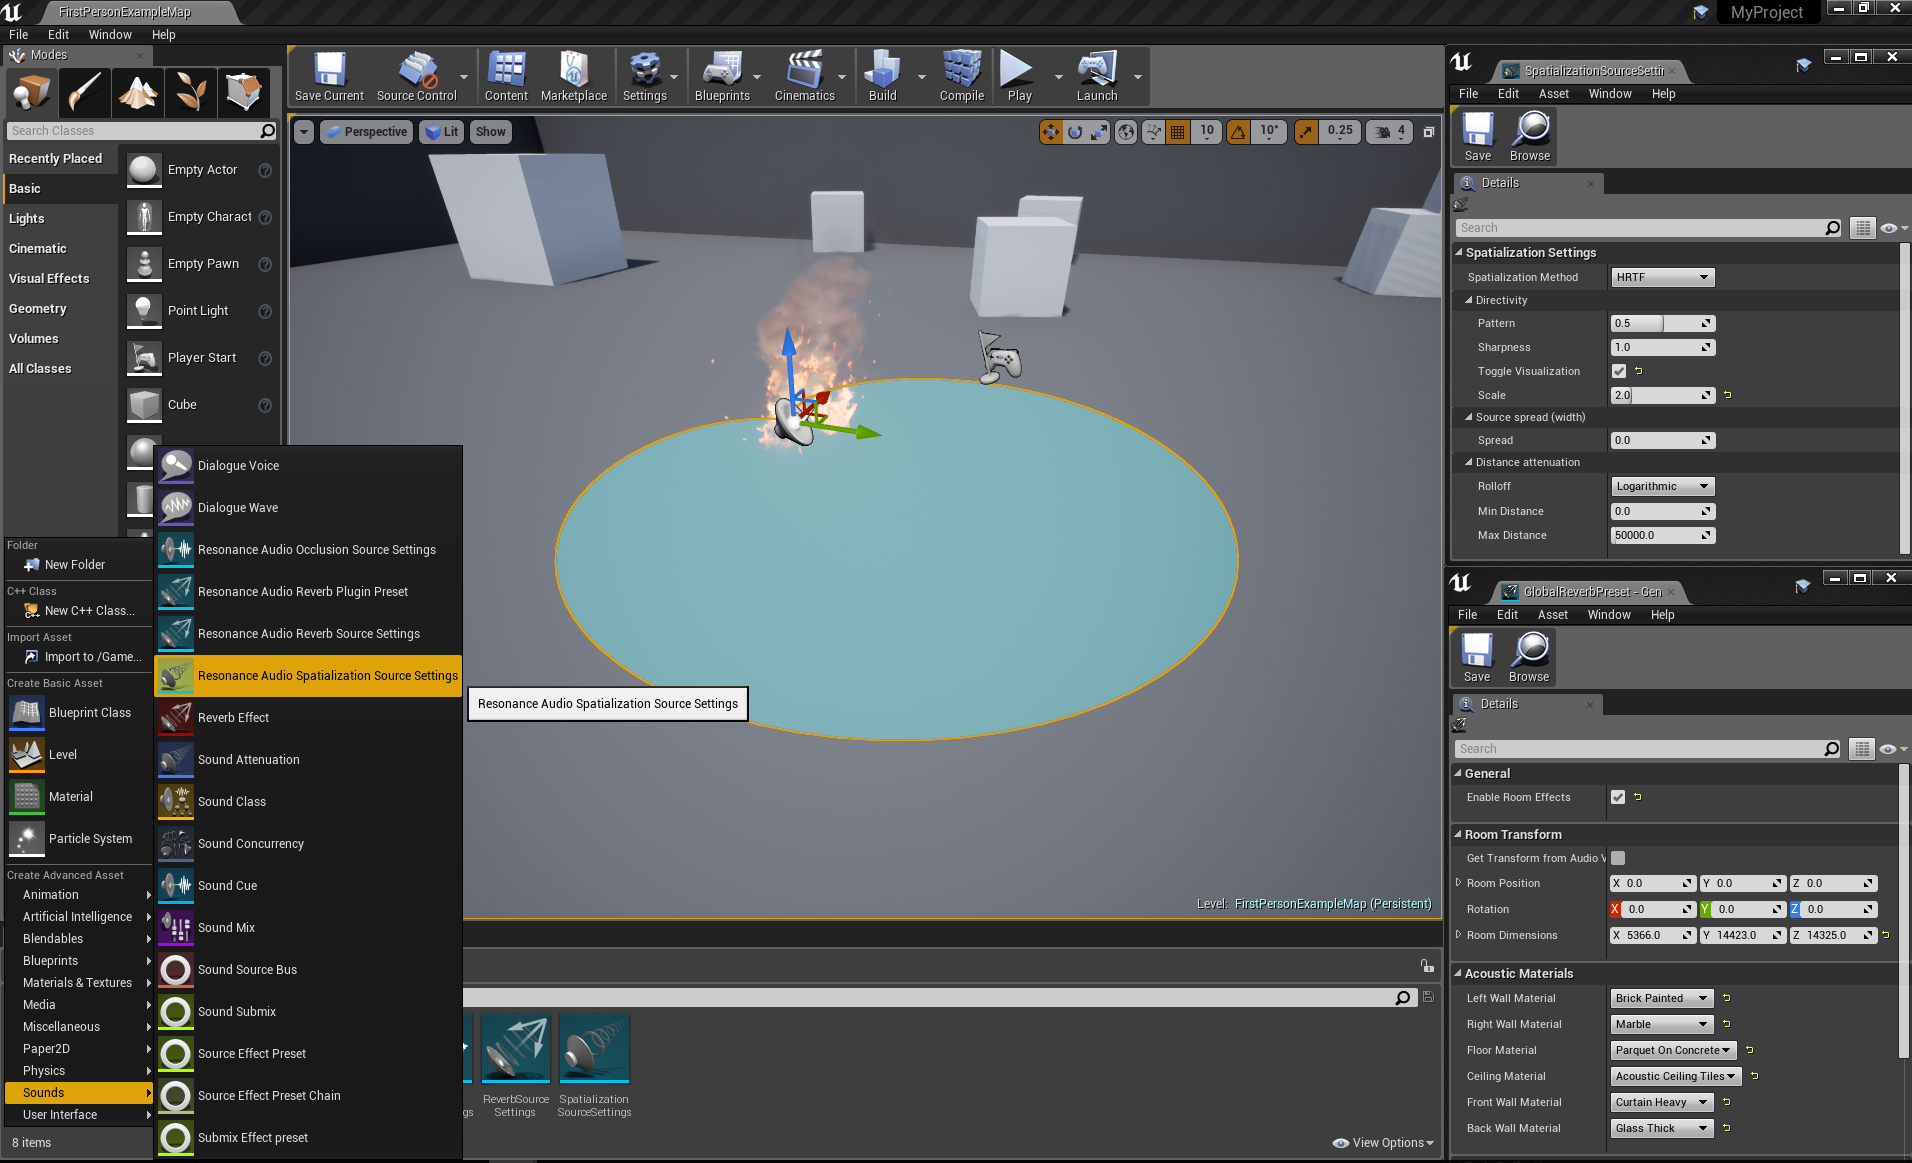
In the Plugin Settings > Spatialization Plugin Settings click + to add a new array element.
-
Open the Spatialization Plugin Settings tab and click the drop-down currently set to none.
-
Under Create New Asset, select Resonance Audio Spatialization Source Settings.
-
Provide a name for the new settings. For example,
FireSoundSpatializationSettings.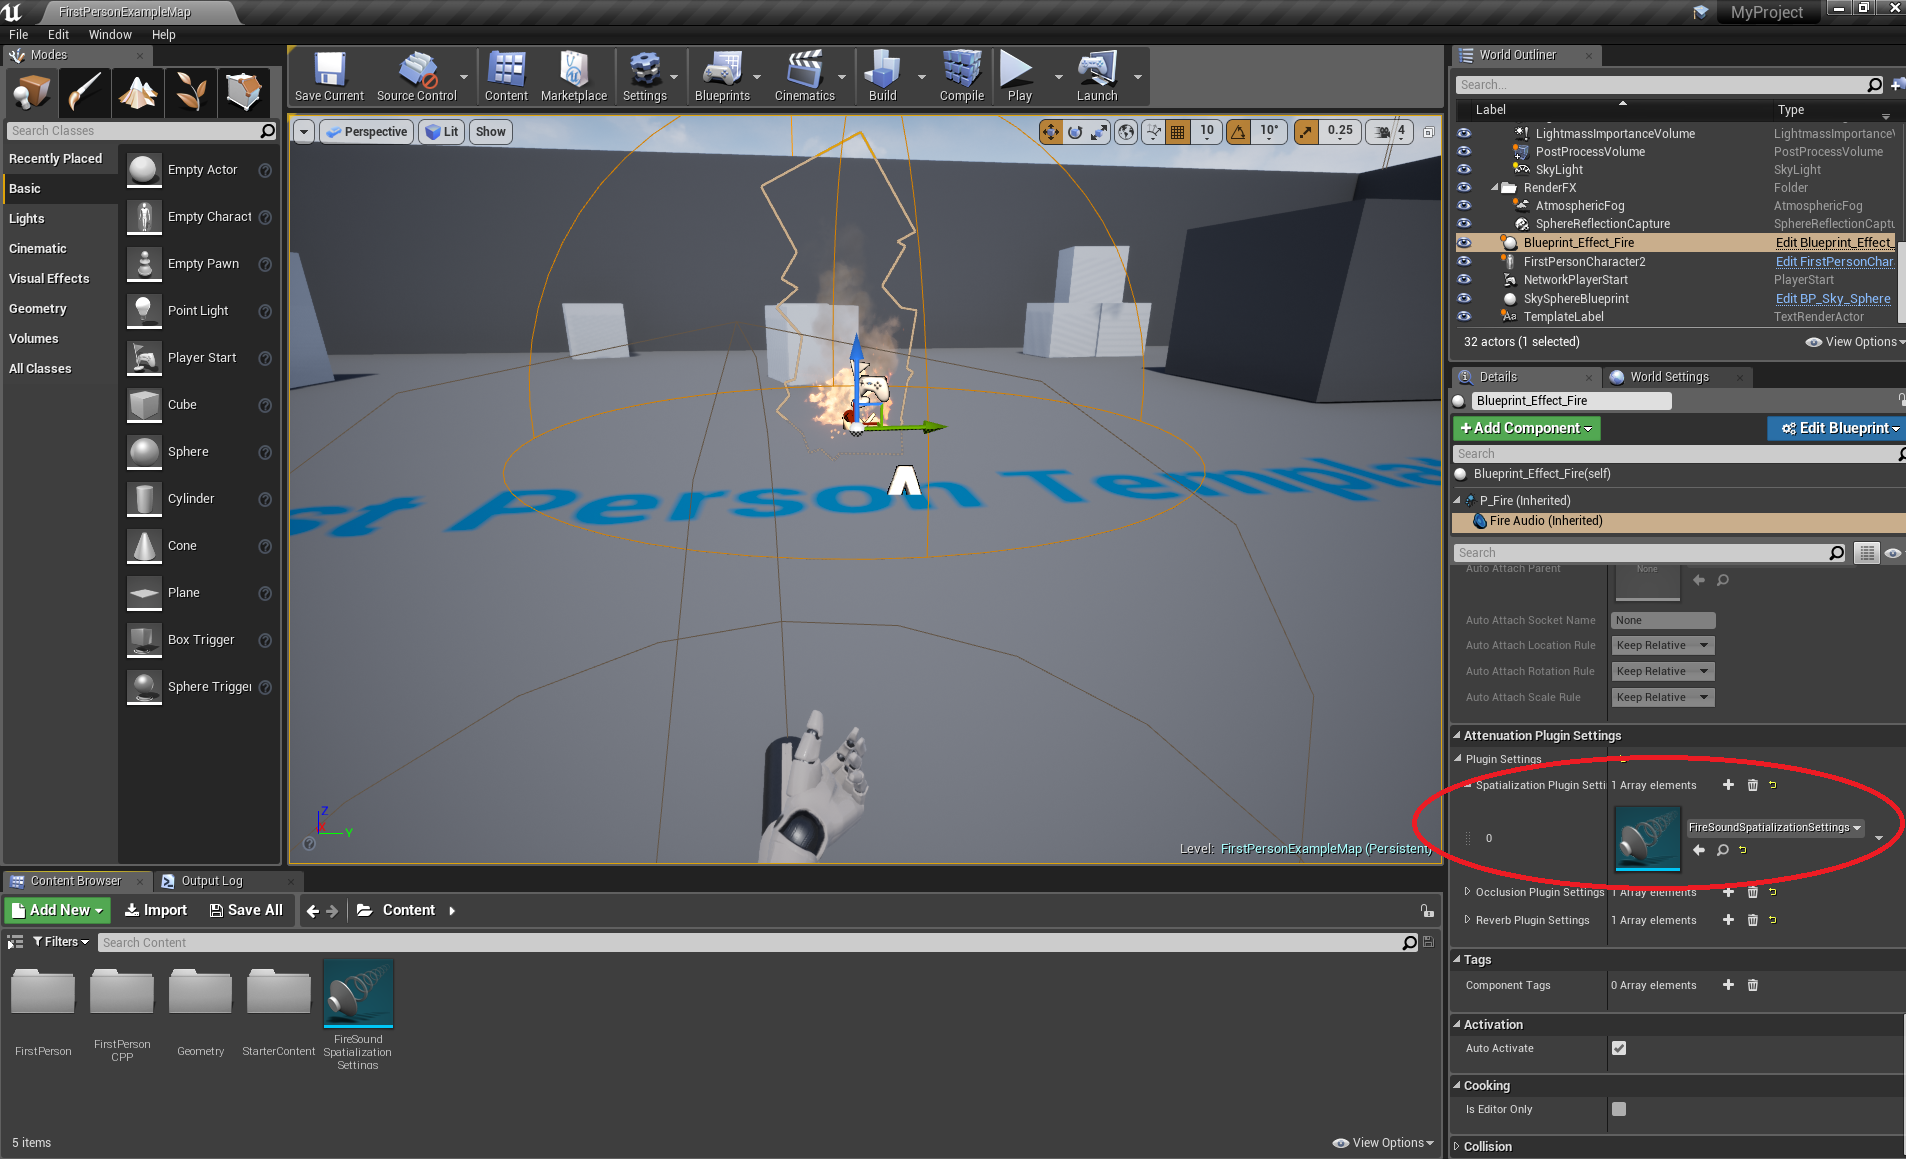
-
You should now see a new icon in the Content section.
-
Double-click the new icon to open
FireSoundSpatializationSettings.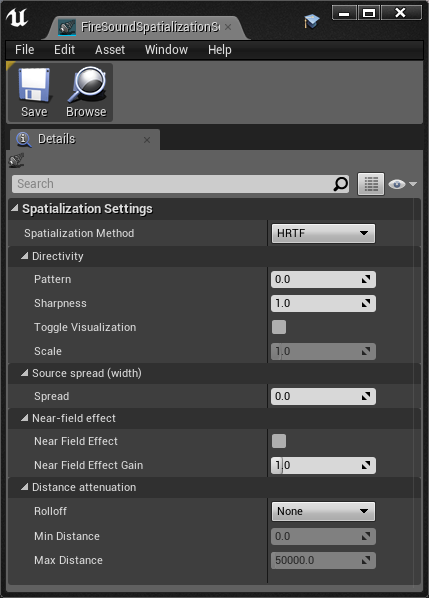
This menu lets you configure spatialization settings for sound sources. You can also control certain parameters in real time. For purposes of this tutorial, you can use the default settings.
Note: The same spatialization settings apply to all sound sources that share the same Resonance Audio Spatialization Source Settings asset.
Play the sound effect with Resonance Audio spatialization
-
Make sure to wear headphones to experience the spatialized audio.
-
Go back to the main editor. Click Play to hear the sound effect with Resonance Audio spatialization.
Ambisonic playback
The Resonance Audio plugin lets you binaurally decode First Order Ambisonic soundfield files that you import into your project. Your soundfields are decoded and filtered with the same Head Related Transfer Functions (HRTFs) used to create the fire sound spatialization effect.
The Resonance Audio plugin supports Ambisonic audio encoded in the AmbiX format (ACN channel sequence and SN3D normalization) and it uses the same binaural rendering pipeline as, for example, YouTube VR/360.
When you play the Ambisonic sound field in your game, the Resonance Audio decoder automatically detects your player’s orientation so that sounds always come from the correct direction.
Import an AmbiX file into your project
-
Prepare your Ambisonic asset by appending
_ambixto its file name. This is required in order for Unreal to interpret the Ambisonic file correctly.For example, you can download and use the
voice_o1_ambix.wavornoise_o1_ambix.wavtest files fromResonanceAudioMonitorVst_*_samples.zipon GitHub. -
In the Content Browser, select Import and choose the AmbiX file.
-
Double click on your imported asset and verify that Unreal interpreted the Ambisonic file correctly. Make sure that in the Sound tab, the Is Ambisonics box is checked.
-
Go back to the Content Browser and play your asset. You should now hear your Ambisonic sound field decoded binaurally using the Resonance Audio decoder.
Note: When importing Ambisonic audio into Unreal Engine, make sure to append
_ambix at the end of the file name. Otherwise, the audio engine will not
mark the asset as Ambisonic and will not route it to the Resonance Audio
Ambisonic binaural decoder.
Next steps
See the Resonance Audio plugin for Unreal Developer Guide to learn about advanced configurations for:
- Spatialization parameters
- Room effects
- Occlusion